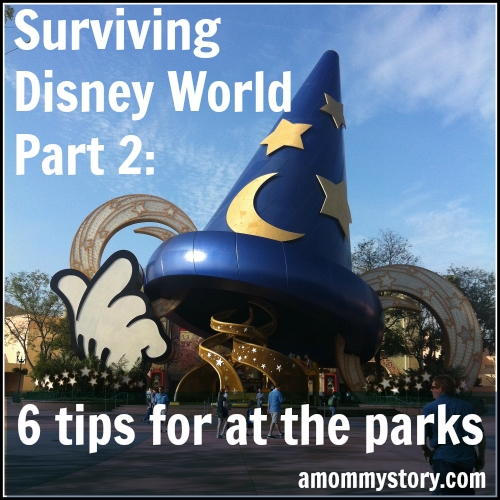
It’s been two months since we returned from our Disney World vacation, and I’m just now getting around to part two of my guide. However, it’s also been two months and we’re still talking about all of the wonderful memories we have from our trip, so you could say it’s still fresh in my mind.
I covered all of my tips for planning your Disney vacation in Part 1, and now I wanted to share my tips for when you finally arrive at Walt Disney World. These are what worked for us – your family may have a totally different way of doing things, and that’s perfectly fine. But if you don’t even know where to start, some of these tips might work for you.
Map out your “must do” list in advance.
Walking into Magic Kingdom is overwhelming. There are people everywhere, and after you walk through Main Street to the castle, you’re presented with the ultimate Choose Your Own Adventure. The castle is the center point for all paths leading to each area of the park. You’ll see amazing sights off in the distance of each, and if you didn’t put a plan in place, your first family argument will also begin here.
Take some time before the trip, or even the night before you visit each park, to discuss as a family which rides and attractions are the “can’t miss” ones. For my family, we each named one or two rides we absolutely wanted to ride in each park. Then we used that list as a starting point to make sure everyone left the parks each night feeling like they got to do all of the things they really wanted to do. We also compared our list to a few guides that showed us which rides had the longest lines to prioritize which ones we needed to get to before the lines got long.
Added tip: The My Disney Experience app for iPhone lets you make reservations, check ride wait times, and has a map to show you where you are in the park. But use carefully – the GPS drains your battery quickly.
If you’re staying at the resort, take advantage of the Magic Hours.
This is a huge perk of staying at one of the Disney resorts: each day, one or two of the parks has “Magic Hours” only for resort guests. Some offer early mornings, where those with resort passes can enter the park an hour earlier than everyone else. Other times they have late Magic Hours, where the park remains open an extra hour for resort guests. (They can’t officially kick out those who aren’t resort guests, but once the Magic Hours start, you have to show your resort pass to get on any ride.)
The lines are SO much shorter during Magic Hours. We wanted to go to Enchanted Tales with Belle on our first day in Magic Kingdom, but the lines were impossibly long. (Over an hour and a half.) At the end of the week, we went back to Magic Kingdom on the day they opened an hour early for resort guests. We got in right when the park opened, went straight back to Enchanted Tales with Belle, and were a part of the first performance with no waiting. It wasn’t even as crowded as they usually make each performance, so both girls had the chance to play good roles in the story.
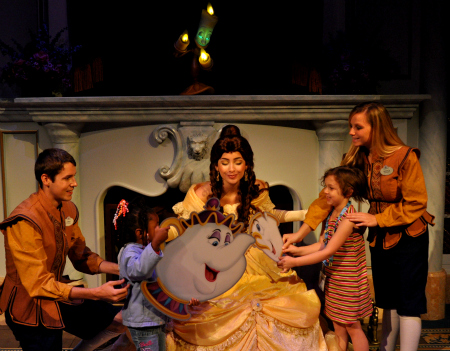 Mira got to be Chip, Cordy was Philipe.
After that, we still had 40 minutes left in the Magic Hour, so we rode Dumbo with only a five minute wait and Under the Sea – Journey of the Little Mermaid with no wait. The Magic Hours are definitely worth it.
Use the Fast Pass system.
One of the smartest ideas Disney World ever implemented is the Fast Pass system. Here’s how it works: say you want to ride Big Thunder Mountain Railroad and the wait is currently one hour. If you don’t want that wait, you can go to the Fast Pass kiosks near the entrance to the ride, insert your park ticket (or resort pass) and it will return your park ticket and spit out a Fast Pass ticket with a return time, usually an hour later or more in the day. The return time is an hour long window, so you don’t need to be back at a precise time.
At that point, you can go shop, ride another ride with a shorter wait, or do whatever you want. When your Fast Pass time window opens, you go back to the ride’s entrance, find the Fast Pass entrance, hand the cast member your Fast Pass ticket, and then bypass the long line. There may still be a short wait, but it’s usually no more than five or ten minutes at most.
This system works very, very well, and many rides offer Fast Pass. Some of the character meet-and-greets have the Fast Pass system, too. Best of all, this is a FREE service available to any park guest. It’s genius – you spend more of your day seeing the parks and less time waiting in line.
There are a few things you need to be aware of, though. First, you can’t run to each ride and collect all of your Fast Passes at the start of the day. You can usually only have one or two at a time – your Fast Pass ticket will tell you when you’re eligible to get a pass for another ride. If your Fast Pass doesn’t have you returning until much later in the day, you’re usually allowed to get another Fast Pass within an hour or so.
Second, there are only a limited number of Fast Pass tickets each day. When one time window fills up, it rolls over to the next time window. So if a lot of park guests are trying to get Fast Pass tickets for Toy Story Midway Mania! in Hollywood Studios, it’s possible they’ll be out of Fast Passes for the day by lunchtime, and then your only choice is to wait in the long line.
And that’s not just any example: Toy Story Midway Mania! routinely is out of Fast Passes by midday. Same goes for Under the Sea – Journey of the Little Mermaid in Magic Kingdom and Soarin’ in Epcot.
Get a PhotoPass right when you walk into your first Disney park.
You know when you go to an amusement park and they have photographers mobbing the entrance, all trying to get one photo of you at the park and then hope you’ll buy that single photo (in multiple sizes and a photo keychain) on the way out? Well, this is one case where you really DO want to let them take your photo. And then immediately ask the photographer for a PhotoPass.
Chances are, your kids are going to want photos with characters, and you’ll want photos of them in front of the castle, or the tree in Animal Kingdom, etc. But for once, YOU can be in the photos, too, thanks to the PhotoPass. It’s a card with a barcode and retrieval code on the back. Whenever a Disney photographer takes your photo, you hand them your PhotoPass, they scan the barcode, and the photos are now assigned to that card’s account.
One card is good for your entire Disney stay, so you’ll have all of your Disney photos in one place online. Then, when you get home you can log on to the PhotoPass site, enter the code on the back of the card, and view all of your photos. The site has editing options, including adding special effects to your photos:
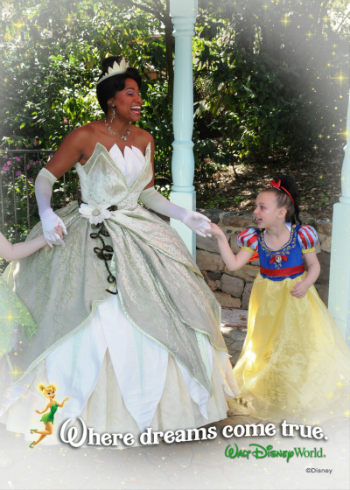 Mira loved twirling for Tiana.
It’s easy to order prints or photo products from the site. Or just purchase the rights to all of the photos. (Hint: it’s a flat fee for buying all of your photos. If you think you’re going to do this option, make sure you REALLY load up on photos at the parks!)
Unlike most parks, Disney parks have photographers throughout the parks. Many of the characters have an official photographer with them, Enchanted Tales with Belle uses a PhotoPass photographer, and they’re also stationed around most popular photo spots. Mira participated in Jedi Training at Hollywood Studios and there was a PhotoPass photographer who took photos for all of the parents. Without her, we wouldn’t have had this great shot:
 Mira takes on Darth Vader, guided by her Jedi Master
Certain spots can also allow the photographer to add in “surprises” – we had no idea why the photographer was asking Cordy to do this pose until we viewed the image at home:
 Wow! Hello, Sebastian!
I’m a huge fan of the PhotoPass, and it was awesome to actually be in my family photos for once.
One final tip: if you have a smartphone, take a photo of the back of your PhotoPass right when you get it. That way, if you lose the card, you’ll still have access to the code so you don’t lose the photos you already have.
Take advantage of “special event” buttons.
If you want to feel like a rock star, visit any guest services and pick up any “special events” buttons that apply to your family. In our case, Aaron and I wore “Happy Anniversary” buttons and Cordy and Mira wore “1st Visit” buttons. They also have buttons for birthdays, special celebrations, family reunions, and many other situations. Cast members will go out of their way to wish you well with these buttons, and sometimes offer up a little surprise, too.
In Hollywood Studios, one of the cast members in a shop gave Aaron and I chocolate-covered marshmallows when she saw our buttons. The kids were each given a pin from a pin trading board when another cast member saw it was their first visit. Even guys in business suits (I can only imagine that they work in Disney management or something) stopped to talk to the girls and ask how they were enjoying their first visit to Disney. It was very sweet and made our trip even more special.
Tip: want a really personal experience? Write you kid’s name on his/her button, and the cast members will call out to them by name as if they’re old friends.
Consider a park hopper pass.
There is a lot to do in every Disney park. But despite all of the planning, you may find that one day just isn’t working out as planned, either due to weather or sore feet in a large park, or because the kids just aren’t feeling the international mood at Epcot and would rather spend some time in the Pixar area of Hollywood Studios. With a park hopper pass, it’s not a big deal. It’s a small additional cost to your park tickets, but with the park hopper option you can visit multiple parks in the same day.
This is useful if you can only get a character dining reservation on a day when you didn’t plan to be in that park. For us, it was useful on the day when we went to Animal Kingdom. It was only open until 5pm that day, and my mom was taking the kids for part of the day. So we spent the morning there, and then Aaron and I went to Epcot for a bit, then met up with friends at Hollywood Studios, and then ended our night under the fireworks at Magic Kingdom. We didn’t plan to hit all four parks – it just worked out that way, and we were thankful to have the park hopper passes!
I think that covers most of the big topics for visiting Disney. I still want to point out some of the best rides and attractions, as well as tips for smoothly sailing through Disney World with a special needs child, but that will have to wait for another post.


Thank you so much for writing such thoughtful posts on this topic! We want to get to Disney, and I will pin this info for reference!
I’ve never been to Disney and never plan to go, but those were some great tips. I will have to direct some 1st timers to you blog!